Are you planning to try vermicomposting but not sure whether it is right for your plants or not?
The best way is to try it out, vermicomposting. Don’t worry my friend, today in this article, I will discuss vermicomposting, advantages and disadvantages and I will guide you through everything. So, let’s begin with an introduction to vermicomposting.
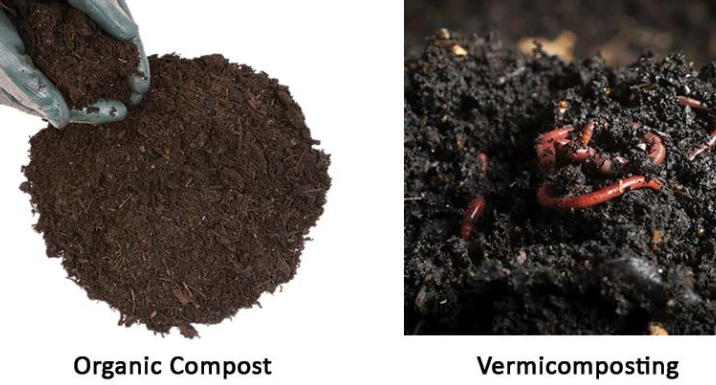
Vermicomposting, sometimes known as worm composting, is one of the most efficient natural methods for producing wonderful garden compost from organic waste. It is scalable and simple to implement as well. Therefore, regardless of the size of your garden, it is an ideal pursuit. Vermicomposting replicates the processes by which worms, bacteria, and fungi break down organic waste. Indeed, it is substantially faster even though it duplicates the methods.
Now, let’s discuss the vermicomposting techniques, elements you need, the procedure, advantages, and disadvantages of vermicomposting.
Vermicomposting techniques
There are two important techniques for vermicomposting!
- Making beds: Beds are made on the ground. It is simple to keep up.
- Pit method: Composting is done using the pit method in cement-made pits
The Bed method
In this method you can do composting by making a bed for example you can make a 6*6*2 feet of organic material on the floor, make sure it is not a concrete floor. According to me, this will be simple for you.
Pit method
The following method uses a 5*5*3 feet concrete pipe for composting. The unit is covered with thatch grass or any other locally appropriate material. I am not going to recommend this method because of inadequate aeration, water clogging at the bottom and the cost is way higher when compared to other methods.
Elements needed for vermicomposting
Organic waste includes farm trash, animal waste, food scraps, cow dung, and dried crop wastes. For vermicomposting, always combine agricultural waste from both leguminous and non-leguminous plants. Earthworms are those present in soil and those that are readily available locally and exhibit extended action. Particular earthworms are preferred for fast action. The particular species of earthworms used for composting are Eisenia fetida (red wiggler worms), which are favored primarily for their robust capacity for replication. Eudrilluseuginiae (African nightcrawler) and Perionyx digs are also used which are very good for vermicomposting.
The process of vermicomposting
Let us check out the processes needed for vermicomposting:
- Depending on the availability, a plastic or concrete tank can be used to prepare the vermicompost (Size- based on the number of raw materials available)
- Gather the dried biomass (e.g., municipal garbage, animal waste, and garden waste) and cut it.
- Mix the chopped dry material in a 1:3 ratio with the cow manure, then set the mixture away for 15 to 20 days to partially decompose.
- At the bottom of the tank, add a thin (2–3 inch) layer of dirt or sand.
- The partially decomposed cow manure and the dry waste combination should now be added to the bedding. Spread it evenly throughout the ground.
- Add the mixture gradually until it reaches a depth of 0.5 to 1 foot.
- The earthworms in the tank (1000–2000 earthworms per square metre) are now released. Cover the mixture with plastic, straws, or gunny bags.
- Keep an eye on the bin to see whether there is food for the earthworms, and add it as needed (fruit and vegetable peels, other kitchen waste) (make sure not to add excess food)
- Water frequently to keep the soil moist.
- Keep an eye on the composting tank’s temperature and moisture levels.
- Every 30 days, beds should be turned over to ensure optimal aeration and decomposition.
- In 45 to 50 days, compost will be ready.
For extracting the compost for use!
Before extracting the vermicompost, you must follow the steps I have mentioned below!
- Earthworms consume food and expel the waste.
- In the bin, a soft, dark-brown substance resembling hummus develops after 45 to 60 days.
- Worm casting, vermicast, and vermicompost are all names for this collection of casting that has formed on the top layer.
- Separate the earthworms and add them to new biomass before collection.
- Earthworms will begin their activity and carry on with the vermicomposting process.
- Once per week, the castings can be collected.
Preventative actions that you must follow!
I know vermicomposting can be a challenging task, but you must follow some preventive actions before trying out this procedure!
- The location ought to be cold, shaded, and wet.
- It is important to thoroughly dry biomass.
- To prevent heat, cow dung must be at least 15-20 days old.
- Plastics, hazardous chemicals, metals, pesticides, and other substances should not be present in organic waste.
- Avoid feeding the earthworms dairy, ginger, meat, and acidic foods like lemon, orange, and citrus meals.
- For earthworms to thrive and reproduce, proper aeration must be maintained.
- Keep the moisture level at its appropriate level (above 50 percent, usually 70-80 percent is considered ideal)
- Maintaining the ideal temperature is important (Temperature – 18-25o C)
Advantages and Disadvantages of Vermicomposting
Now you know the process of vermicomposting, let us now discuss the advantages and disadvantages of vermicomposting!
Advantages of vermicomposting
1. It is speedy – When using worms to compost, the finished product should be available in two to three months, depending on the environment.
2. Worms are multiplying – There will be a lot more worms available for you to “play” with once the composting cycle is over. Again, under the correct climate, worm populations will double in around 90 days. That means you will have 100% more worms than you started if you let your compost sit for three months. It’s not awful at all! To stimulate additional vermicomposting, you can introduce those extra worms to your garden.
3. Interior or exterior – Yes, you can vermicompost indoors or outdoors. If you are a vermicomposter with a real passion, you can even put your composting bins just underneath your kitchen sink. Simply make sure that all organic material added to the bins beneath the sink is broken up into small bits. This expedites the process and lessens the chance that an unpleasant stench may spread throughout your house.
4. Vermicompost aids in enhancing the soil’s structure, texture, porosity, and ability to retain water, drainage, and aeration while lowering erosion.
5. By promoting the development of new shoots and leaves, enhances plant growth and raises production. The pH of the soil is neutralized as a result.
6. Vermicompost increases the beneficial bacteria in the soil, which reduces the likelihood of disease and pest infestation.
7. There are no diseases or hazardous substances present.
8. Numerous micro– and macronutrients, vitamins, enzymes, and hormones including auxins and gibberellins are among its constituents.
Disadvantages of vermicomposting
1. Fruit fly – Fruit flies can be unpleasant, even though they are safe. Furthermore, there is no question at all that organic compost, whether it is outside or within the house, may and will draw fruit flies. But you can lessen or even solve the issue. If your composting bins are outside, cover the top of the organic waste with dirt before adding a tiny amount of food scraps.
2. Pathogens – Vermicomposting promotes pathogens more than “regular” composting since there is less heat buildup. The heat produced by conventional composting techniques does aid in the destruction of bacteria, including E. coli.
3. Cost – There is an upfront expense associated with vermicomposting, even though it is relatively inexpensive. Bins are a necessary investment, or perhaps you already have some. You’ll also need to buy those if you can’t gather enough worms from your garden.
4. Smell – If done incorrectly, it emits a foul odor. The odor is caused by ammonia, which is created when green plants are added to the compost bin. Paper is a carbon source that can be added to reduce odor.
5. Time – The process is lengthy and often takes two to three months to complete.
6. Maintaining the temperature – A consistent temperature will help earthworms function more effectively. The unpleasant smell draws flies and rodents. So, the trash should be adequately covered.
FAQs
Q1. Can I make my compost at home?
Ans. Yes, You can design your vermicomposting system such that both the worm population and the ecosystem are at their best.
Q2. What is the final result of compost?
Ans. The finished result, compost, or manure if you prefer, is nutrient-rich and contains plenty of nitrogen, potassium, and phosphorus (the big three).
Q3. Does the compost smell bad?
Ans. If done incorrectly, it emits a foul odor. The odor is caused by ammonia, which is created when green plants are added to the compost bin. Paper is a carbon source that can be added to reduce odor.
Q4. What is Vermicast?
Ans. Vermicast is nutrient-rich, which promotes plant growth and suppresses dangerous soil bacteria. So, it is referred to as black gold. This is the best kind of natural manure because it is cheap, nutrient-rich, and simple to prepare and handle. Humus, nitrogen (2.3-%), phosphorus (1.55-2.25%), potassium (1.85-2.25%), micronutrients, and other advantageous soil bacteria are all abundant in vermicompost. The quantity of nitrogen-fixing bacteria and actinomycetes increases when vermicompost is used. In general, it is the best kind of organic amendment for enhancing crop development and output.
Conclusion
One kind of sustainable agriculture that adheres to the ideals of organic farming is vermicomposting. It is an organic fertilizer that is made naturally by earthworms, who turn organic substances into manure. By lowering the C: N ratio in manure, earthworms aid in the breakdown of complex organic waste. They improve the soil’s characteristics and enrich the microorganisms’ environment, fostering microbial activity. Vermicast is produced by a method that is environmentally beneficial and turns into biodegradable material. The methods, benefits, and drawbacks described above will support you in sustaining balanced use.
I hope you like my article and if you have any further questions in mind, please comment down below, and don’t forget to share it with your friends and family!
Related Articles
- Top 10 Organic Fertilizers: Boost Your Plant Growth Naturally

- NPK Fertilizer: Everything you need to know
- What Are The Advantages And Disadvantages Of Vermicomposting?
- Fertilizer for Indoor Plants: How and When to Fertilize Houseplants
- Bonsai Tree Fertilizer 101: Essential Nutrients and Techniques for a Thriving Tree
- What is Vermiculture: Process, Uses and Benefits